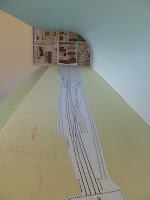
Before i could lay the first sleepers i got to lay the foam. Im using extruded polystyrene foam (XPS) This type of foam is perfect for cutting up into bits to make the scenery it is very dense but very light in weight. Make sure you don't use the common white expanded foam. It does not work. It comes off in little white balls and will only cause trouble. The XPS foam is a little bit hard to get as there are not many shops in Melbourne that sell it. It comes in many thickness as well, the colour does not matter as long its not white. To glue it down onto the layout i used a Polyurethane glue. This glue will not melt the foam but the foam has to be clamp down as the glue does expand when drying. The colour of foam is the two different thickness ive used. 30mm on the top (trackbed) and 50mm under the 30mm foam out to the side. This will help form the drop off on the side of A box. Ive also glued down my track plan in position using pva glue. The track plan was printed on one long piece of paper. The plan was drawn up in corel using my track templates. It all to 1:160 scale
Click to make bigger
Track Laying
With the foam and track plan down and dried came the moment of truth time to lay the first lot of sleepers. I started to lay in the area of the two B grade sidings. These to sidings would have been hardly used, both have dead ends. These sidings would have just been kept in service not much repair work would have been done to them as traffic would have been very slow when shutting into these sidings. Keep that in mind i wanted to get a little bit of a rough look to them. It doest matter if its not straight and perfect. Its hard to see now but when it comes to colour it will stand out a bit more against the main line and other sidings. Down below is the process of laying the track.
1. Placed the sleepers in the jig.
2. Masking tape is than put onto and pressed down onto the sleepers in the jig.
3. The tape is than lifted out of the jig pulling the sleepers out holding them in position.
4. A test fit is done on the track plan to where they are going.
5. PVA glue is than applied to the area and move around with a brush.
6. The sleepers are laid into position and press down. Some areas may need a little bit of weight.
7. Once glue is dried the tape is removed.
 |
| 1. Sleeper placed in jig |
| 2. Tape placed on sleepers |
 |
| 3.Sleepers being pulled out |
 |
| 6. Glued and weighed down |
 |
| Drying with tape on |
 |
| No Tape |
There gaps left for the pc sleepers to go when the rail is laid. The pc sleepers will help hold the rail in gauge. Once all the sleepers are laid i will them colour them and than the rail can be laid. Its a easy process to do and im really looking forward to how its going to look when all the sleepers are laid. As always any questions or remarks email me at bendigonscale@live.com.au Stay tuned for more.


No comments:
Post a Comment